onTune nmon Analyzer Plus – * Installation Steps
1. Execute ONAplus_setup.exe.

2. Choose “I accept …”.

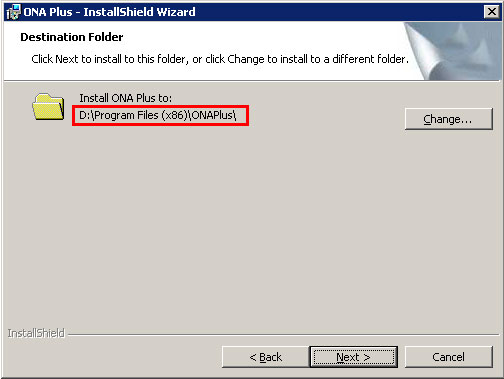
3. Choose a location to install. The drive must have enough space to save data.
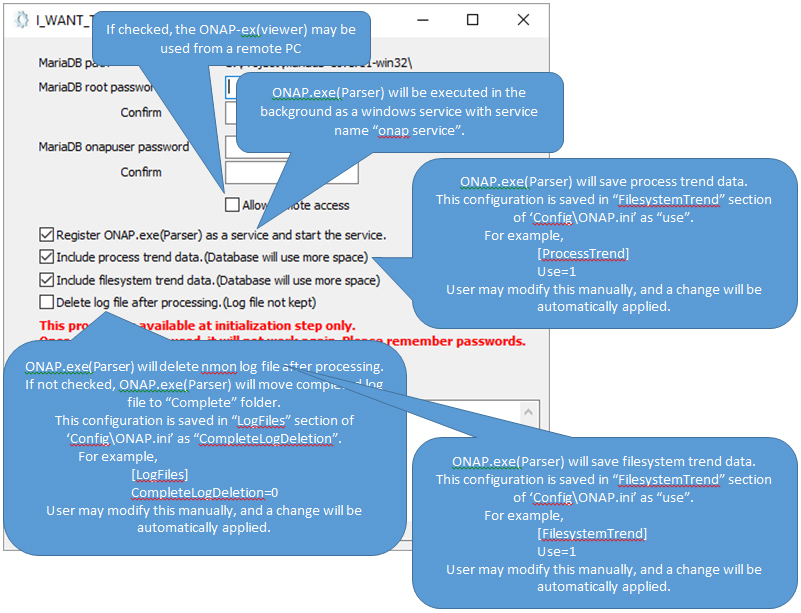
4. Complete setup process with below option to run a configuration program.
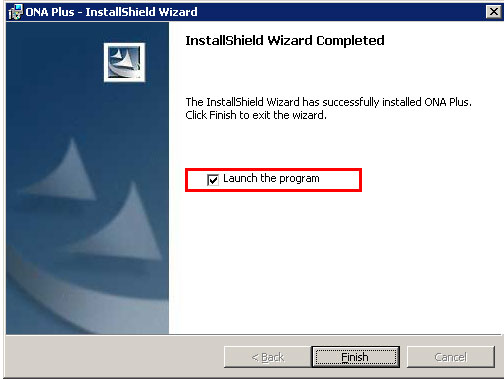
5. After installation, “I_want_to_use_this.exe” is executed through “Launch the program” checked at last stage of installation.
A “User Account Control” warning dialog may appear on occasion due to unknown publisher. Please ignore the warning and continue.
STARTING ONA Plus
- Copy nmon files to NMONLogs folder of ONAP.
1) After installation, ONAP(Parser service process) is running in background, and looking in “NMONLogs” folder.
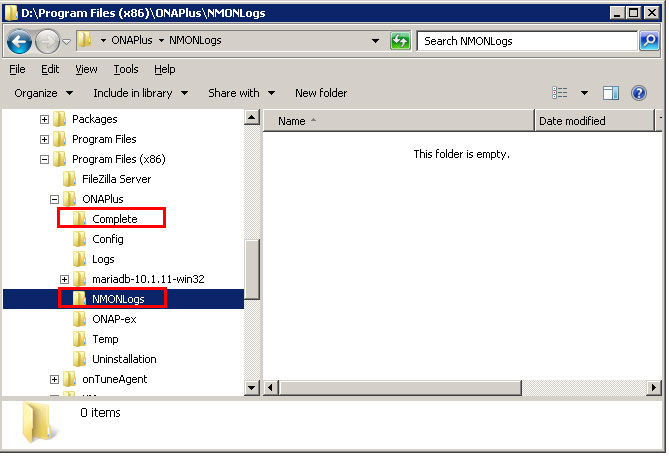
2) ONAP reads the log file and processes if nmon log file is copied to “NMONLogs” folder.
3) After ONAP’s work, the nmon log file is deleted or moved to “Complete” folder depending on the option in ONAP.ini as below;
[LogFiles]
CompleteLogDeletion=0
/* move to Complete folder in case of 0, and delete in case of 1 */
2. To analyze the result from nmon log files, execute ONAP-ex.exe as user program.
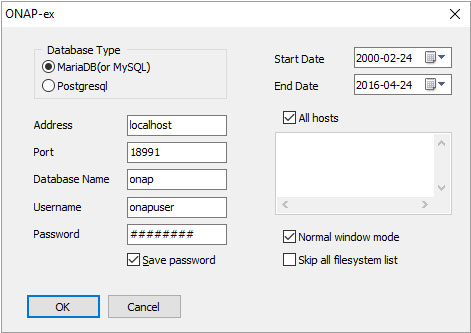
Dialog box below appears:
- Database Type: Choose database type for use as ONA Plus repository.
- Address: Address of ONAP database. ONAP-ex may run remotely.
- Port: Database connection port.
- Database Name: Database name for ONAP.
- Username: Database user name for ONAP.
- Password: Password for database user.
- Save password: Database encrypted user password will be saved if checked.
- Start Date: Start date for analysis.
- End Date: End date for analysis.
- All hosts: ONAP-ex will show all hosts if checked; if unchecked, only specified hosts you list in the memo box below will show. (the memo box recognizes each input entry as a pattern – e.g. if you enter “test”, every hostname containing “test” will be shown)
- Normal window mode: Enlarge ONAP-ex window if not checked
- Skip all filesystem list: ONAP-ex will not show all filesystems of all hosts in the Filesystem section if checked.
- Loading time will be reduced if checked.

